Minecraft Ellispoid Generator
Guide to generating hollow ellipsoids in Plotz modeller for Minecraft. Plotz can model ellipsoids of varying width, depth and height up to a maximum of 256 blocks in all dimensions. This page will give you all the information you need. You can then you can launch Plotz Minecraft Ellipsoid generator.
Launch Plotz Minecraft Ellipsoid Generator
Using Plotz to make Ellipsoids in Minecraft
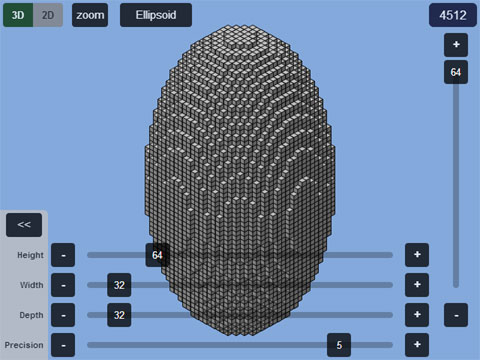
Ellispoids are great shapes for modelling buildings, domes, airships and more. You can start Plotz Ellipsoid Generator from the link above or select the ellipsoid model from the Plotz model menu. The initial screen shows an ellipsoid 64 blocks in height and 32 blocks width and depth. As the full with and height of the browser is always used you can resize your window or even enter full screen mode to make this most of this. When Plotz is running on tablet devices such as the iPad, it will redisplay on screen orientation change to portrait or landscape. When building a tall ellipsoid you may find portrait better and using landscape for models that are wider.

Alter the height, width and depth using the sliders along the bottom. Larger models take longer to render and may display a progress window. The dimension sliders can be hidden using the << button and shown again by clicking/touching the values. Different levels of precision can be used to elimiate square edges on the model's end caps. A higher precision does not necessarily get the best results. Lower precisions render faster and may also be required on low memory devices to prevent render failure.
The top right number is the blocks required to build the model. Return to the model menu at any time by going back in your browser OR selecting the model name button at the top.

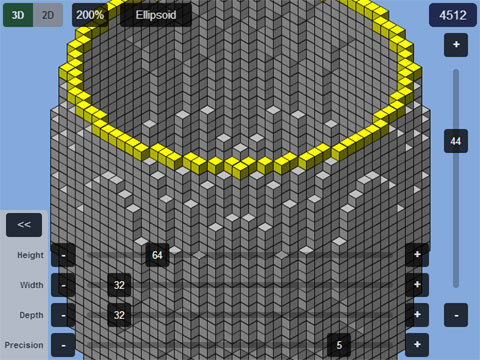
In both 2D and 3D view you can see a particular layer of your model using the right hand slider. In 3D mode the top layer shown is highlighted yellow.
Start building from layer 1, make that layer in Minecraft and then hit the + button to see the next layer and continue building upwards.
Dragging the layer slider to the top leaves the layer highlighted yellow. Select the + button to remove the highlight if required.

Unsurprisingly you can zoom using the zoom button which works in both 2D and 3D display modes. The zoom button cycles through 200%, 400% and back to 100%.
While zoomed, drag the main canvas to pan around. Plotz saves graphics memory by only updating the display when you stop dragging.
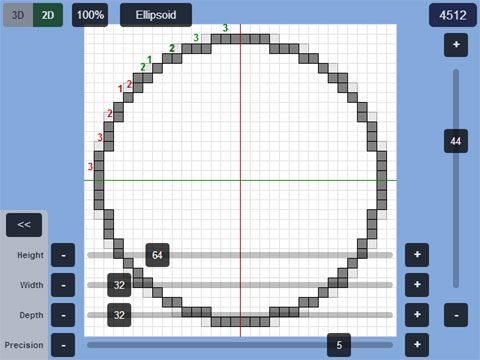
As almost all models are symmetrical, zoom is particularly useful in 2D mode where you can zoom in to the top / left quadrant and build it 4 times over to complete each layer.

Toggle between 3D and 2D mode with the top/left buttons. While 3D shows how a model will look, 2D mode is arguably more useful for actually building, especially for larger models.
In 2D mode a layer of your model is displayed as a 2D grid and axes split that grid in to 4 quadrants. Blocks are clearly displayed and any blocks not covered and on the layer below appear ghosted out which helps positioning and checking your build.
Block counts in coloured groups of 5 (5 red, 5 green, 5 blue etc.) help you build curves. These are displayed in the top left quadrant. Symmetry means most models require this quadrant to be built 4 times over.
